
Installation and setup
Just want to get started quickly?
Using the device for the first time and just want to put an image on it? See Getting started first. This page is the complete setup procedure for installers.
This page takes you from power-on to the signage rotating images automatically, in about 15 minutes. Each step links to detailed instructions.
What you need
- A phone that supports 5 GHz Wi-Fi, or a laptop.
- The images you want to show (JPG or PNG, ideally made at the recommended size for your model).
- The hotspot password (on devices freshly installed with 1.11.0 or later, it's printed on the hotspot label on the device; for other devices, ask your installer. You can also scan the QR code on the startup screen without typing the password).
Step 1: Power on and connect
- Connect the power to turn it on. The status LED flashes (starting up), and within about 1 minute the panel refreshes to the startup screen. When it's done, the status LED stays on (standby).
- Scan the step 1 QR code on the startup screen with your phone's camera to join the device's Wi-Fi.
- Once your phone shows it's connected, scan the step 2 QR code to open the management interface.
- You can also type
http://192.168.100.1directly in your browser (the hotspot's default address).
- You can also type
- If your phone says "No internet", choose Use without internet / Stay connected.
The startup screen looks like this (portrait and landscape layouts depending on the model, with the same content):
| 27.6-inch, 32-inch | 13.3-inch |
|---|---|
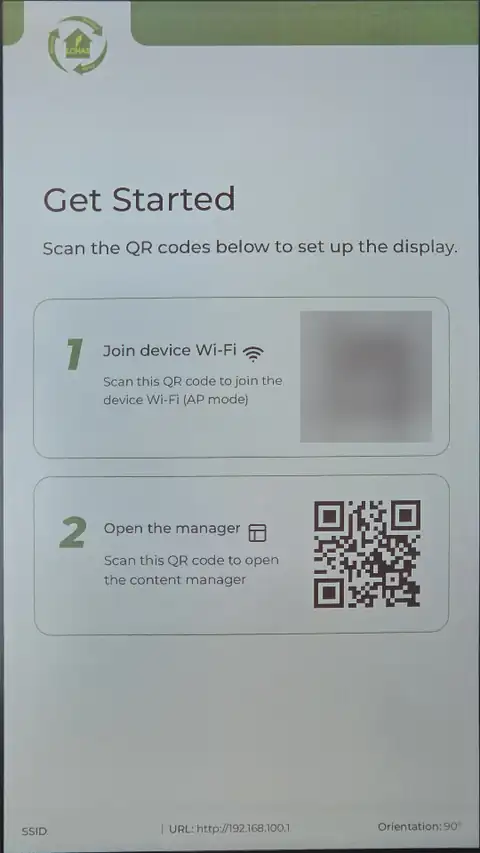 | 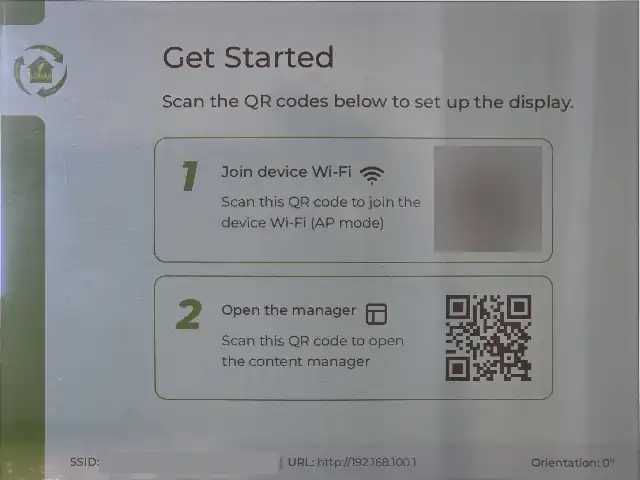 |
The Wi-Fi QR code in these pictures contains the hotspot password, and the hotspot name (SSID) at the bottom is different on every device, so both are masked here. They are shown normally on the actual screen.
See Connecting to the device for details.
Step 2: Check the time and time zone
Schedules run on the device's time, so set it first:
- In the left menu, tap Settings → Time Settings.
- Check that "Time zone" is correct. If not, press Change next to "Device Timezone" to change it.
- Press Sync Local Time to set the device's time from your phone. If the button is grayed out, turn off NTP auto-sync first.
- When you're done, leave this page (keeping it open stops the device from going to sleep).
See Time, time zone and clock sync for details.
Step 3: Check the screen orientation
- Place the signage in the orientation it will actually be displayed in (landscape or portrait).
Orientation:at the bottom of the startup screen shows the orientation the system has detected. The screen should be upright.- If the signage will be mounted in a fixed position, you can go to Settings → G-Sensor Settings to turn off auto-rotate and choose a fixed orientation.
See Screen orientation and G-Sensor for details.
Step 4: Upload images
- In the left menu, tap Image Display.
- In the image gallery, press Upload (the up arrow) → Upload Images, and select several images at once.
- Wait until "All images uploaded successfully" appears.
If you have PDF material to show, you can use Upload PDF to make a collage image. See PDF collage for details.
Step 5: Try displaying an image
- Tap an image in the image gallery and check how it looks in the preview box. If the proportions don't match, adjust the fit mode.
- Tap the image in the preview box → Display Now.
- Wait for the panel to refresh (depending on the model and refresh mode, for example about 6 seconds on the 13.3-inch, about 16 seconds on the 27.6-inch, about 20 seconds on the 32-inch). The panel shows the image, and "Refreshing..." disappears from the preview box.
See Image gallery and displaying images for details.
Step 6: Create an image set
- In the left menu, tap Image Set → Create Image Set.
- Enter a name (for example "Lobby rotation") → Save.
- The image selection window opens automatically. Tap the images in the order you want them to play → Add N.
- Press Done, back to list.
See Image sets for details.
Step 7: Create a schedule
- In the left menu, tap Schedule → New Schedule.
- Enter a schedule name and select the image set you just created.
- For the image change frequency, choose "Fixed interval: Every 10 min", or adjust it as needed.
- Press Create.
The schedule starts changing images at the next scheduled time (for example :10, :20, … past the hour). The countdown on the card tells you how long until then. See Schedules for details.
Step 8 (optional): Turn on sleep to save power
For battery models, or signage that's usually left unattended, we recommend turning on sleep:
- Go to Settings → Sleep Settings, turn on "Enable Sleep", and choose 5 minutes.
- The device sleeps when idle and wakes up automatically before a schedule to change the image.
- The hotspot turns off during sleep. The next time you want to manage the device, press a physical button to wake it up first.
See Sleep and wake-up for details.
Done
The signage now rotates images automatically on schedule. For day-to-day management:
| What you want to do | Where to go |
|---|---|
| Add or replace images | Image Display → Upload; Image Set → Add Images |
| Show a particular image for now | Image Display → tap the preview box to display the image |
| Pause rotation | Schedule → turn off the switch at the bottom of the card |
| Let other people on site connect | Press a physical button to bring up the QR code screen. See Physical buttons and gestures |
| Update the software | Software update |